Global Standards Based on Ideas and Solutions from the Workplace
When production at our overseas plant first started up, it was natural that the first straight rate was low, and losses were substantial.
A company-wide improvement project was launched, and the first straight rate was raised to almost 100% by exhaustively calibrating site data with design values. Today the quality of our lens barrel units is so good that Olympus has become a respected brand in this field, and we are even able to sell lens barrel units to other companies.
The Challenge for Experts: Raising the First Straight Rate for Resolution Higher
In the second half of the 1980s, production of conventional film cameras was shifted to overseas because of pressure to reduce costs. One of the products transferred was the µ ZOOM140, which has been produced at the overseas plant since 1998. Initially, the production line for lens barrel units, which consist of lenses and a barrel, had a first straight rate at a low level and losses were substantial.

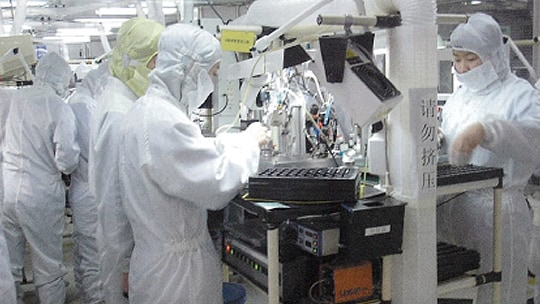
The Shenzhen Plant is seen as an example of successful business overseas.
Resolution is a measure of the degree to which fine details of the subject can be reproduced. It is a vital performance indicator for a camera. In those days the plant was almost totally lacking in both the infrastructure and the corporate culture needed to support collaborative efforts between the engineering and development staff and local employees to devise solutions to this problem. The problem was not one that could be solved solely through the efforts of the plant staff.
In 1999, the senior management of the division became alarmed about this situation and issued a directive that the reject rate should be reduced to zero. A company-wide initiative was implemented. The mission was to eliminate the need for resolution defects completely and without delay. Experts were assigned to the project from the facility and production engineering, optical design, camera design, and quality assurance departments and from overseas plants. The target was to raise the first straight rate in terms of resolution to 100%.
The Solution: Exhaustive Calibration of Site Data with Design Values
Project activity began with a survey of conditions at the plant. Because the problems with resolution were caused by a complex combination of factors, the situation was investigated from various angles using a structural analysis approach.
Structural analysis involved detailed comparisons of process capacity, including the comparison of intermediate quality (intermediate characteristics) with design values (theoretical values). The engineers examined individual parts and conducted a wide-ranging investigation that included processing capacities for each part, the way screws were tightened on the assembly line, the precision of the tools used in production, and the assurance methods specified in the assembly standards used for each process. The task was enormous, and the engineers worked for many hours.
The next step was to analyze and verify the data from a design perspective. Site data were exhaustively checked against design values covering optical characteristics, mechanical characteristics, quality function deployment, and simulation analyses. This effort resulted in the identification of 92 problems and 35 countermeasures. But solutions for some of these problems remained elusive, and the engineers were forced to make frequent visits to the site. Seven working groups were formed to implement the countermeasures. All of these activities were compiled into a document called "Quality Assurance Based on Intermediate characteristic", which was based on the quality function deployment chart.
Building Trust through OJT and Shared Study Methods
One of the focal points for the project was the closing of the gap between the Japanese and local study teams.
Project management was divided between Japan and the local group, but ultimately the goal was to build a maintenance and management framework in the overseas plant. Project participants regularly shared the results of studies that had been carried out in Japan with the local staff, while the Japanese staff spent long hours in the plant working tirelessly with their local counterparts. One by one, the countermeasures were implemented on the production line, and nine months after the start of project activities, the first straight rate for the µ ZOOM140 had reached our original target.
These activities encompassed not only the µ ZOOM140 but also other product lines as well, and it enabled the local staff to implement measurement and evaluation methods relating to quality assurance based in intermediate characteristics as a structured system. A strong sense of trust developed between the local and Japanese staff, and participants gained confidence in their ability to achieve anything that they set their minds to.
Shared Dedication to pursuit of securing Quality Leads to Growth and Success of Overseas Plants
This approach was extended to those produced at the overseas plant, and we saw improvements in the first straight rates for these other products as well. Within the Camera Division, it evolved into activities focusing on the design stage, with the aim of eliminating problems at the source.

The Shenzhen Plant
Today this business operation has become so competitive that we are able to sell lens barrel units to other companies and, Olympus has become a respected name in the industry. This reputation is based on relentless efforts to optimize quality.
Those of involved in the project are reminded of the long hours of work and the daunting task of checking every detail. And we actually feel that the Olympus overseas plant has become a respected plant throughout the world.


